Monday, November 29, 2021

Eden's Garden Pinwheel Card for Kylie Bertucci's International Top 10 Winners for November Blog Hop


Hi, Crafty People!
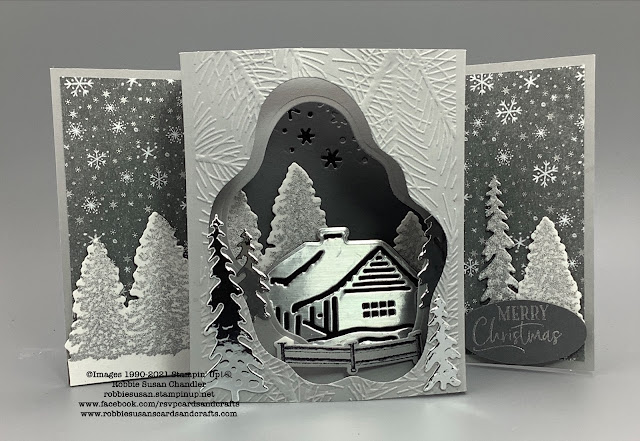
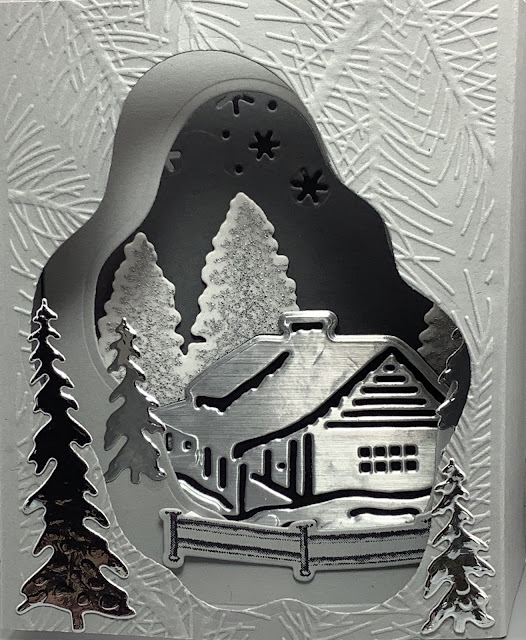
Today I'm joining Kylie Bertucci and a group of very talented demonstrators for a blog hop around the world. I'm so excited to be participating, again, in the Top Ten International Highlights Winners Blog Hop hosted by Kylie Bertucci! I earned this honor with my card, Peaceful Cabin, placing second in Kylie's November, 2021 International Highlights Challenge. Thank you to everyone who voted for my card!
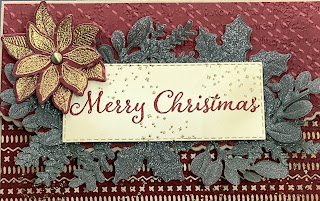
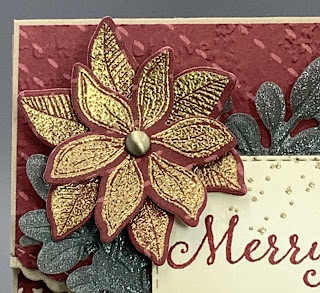
The thank you card I want to share with you today is a pinwheel card. It is a very simple card to make, even though it is complicated looking. I'm going to show you close-up pictures of each part. After all the pictures, there will be a box you can click on to download a free tutorial.

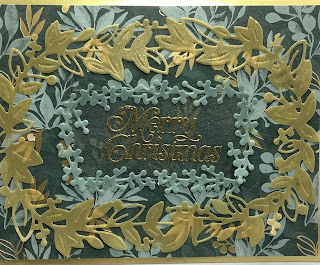
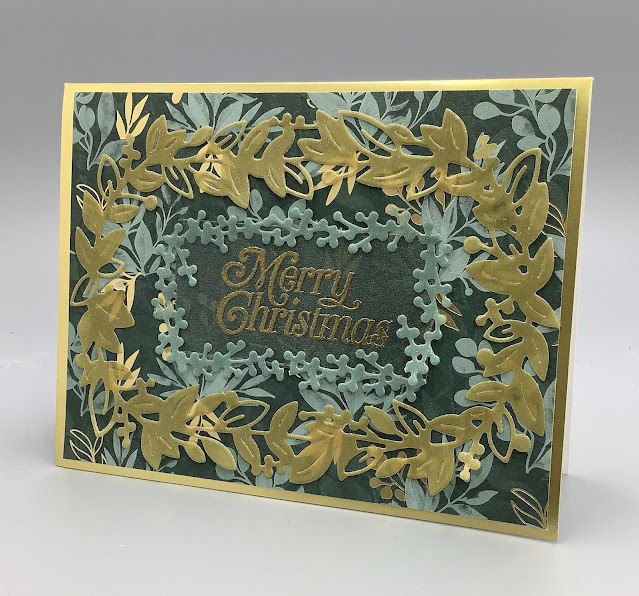
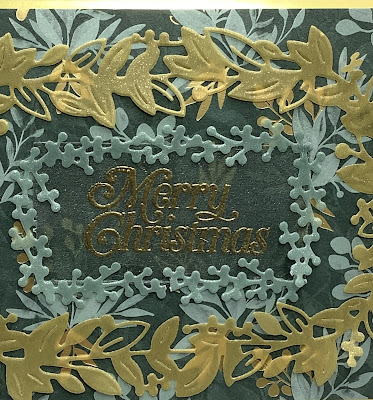
This first side is covered with one of the patterns from Ever Eden Designer Series Paper. The opposite is the lovely Rose Gold Metallic Specialty Paper embossed with one of the 2-set Greenery Embossing folders. The small wreath is cut from 2021-2023 In Color Shimmer Vellum Evening Evergreen. The butterfly is from Brilliant Wings.
This side is where I stamped my sentiment. The gold foil piece is also embossed with an embossing folder from Greenery.
A different piece from the Ever Eden Designer Series paper is used below, and I repeated the Rose Gold Metallic piece. The dandelion was cut from gold foil with the dandelion die from Dandy Wishes.
Below is a close up of that lovely Rose Gold Metallic paper embossed with the Greenery Embossing folder.
The piece below is a third design from Ever Eden Designer Series Paper. The gold foil is embossed with an embossing folder from the Meadow Moments embossing 2-folder set. When folded up, I designated this the card front.
I know you are wondering if this card will fit in the Stampin' Up! medium envelope. In the below picture, I folded it down to show it folded up, and yes, it will.
To download a complete step-by-step tutorial, click on the box below.
Wouldn't you just love to receive or send this thank you card? Just think of all the possibilities with some of our other gorgeous designer series papers! If you would like to duplicate this card, all the supplies I used are listed below with links to my store.

Please take a minute to check out the projects from the other Top 10 Winners!


Subscribe to My Blog and Newsletter
* indicates required
Product List

Sunday, November 28, 2021

Eden's Garden for Share It Sunday Blog Hop


Hi, Crafty People!
Today I'm participating in the Share it Sunday Blog Hop. This is a group of demonstrators from around the world sharing their fabulous projects with everyone.

My card I'm sharing with you is a Christmas Card using the Eden's Garden Bundle and Ever Eden Designer Series Paper for this card.
The card base is Basic White thick with a 4 1/4" x 5 1/2" gold foil piece adhered to this. Next, I adhered a 4" x 5 1/4" piece of Ever Eden Designer Series Paper to the card base.
The oval wreath design was cut from Gold Shimmer Vellum that can be found in our current July to January Holiday Catalog. The inner wreath was cut from our In Colors Soft Succulent Shimmery Vellum located in the current Annual Catalog. I love the shine and shimmer these vellums add to a card.

The gold embossed Merry Christmas is from the Perfectly Plaid stamp set and I heat embossed it  on the Evening Evergreen In Colors Shimmery Vellum.

I hope you like my card well enough to give it a try. All the supplies I used are listed below. 

Also, our $75 joining special ends November 30th. When you sign up to become a demonstrator, hopefully on my team, for $75 you will receive $125 in your choice of products. This is the best signing-up special I have seen Stampin' Up! offer in a long time.

Now please take minute to check out all the fabulous projects from the demonstrators listed below.


Subscribe to My Blog and Newsletter
* indicates required
Product List

Monday, November 22, 2021

Peaceful Cabin Shadow Box Card for Next Card Classes

Hi, Crafty People!
Announcing my next card classes coming up next week. We'll make 2 Christmas Cards, one a gift card holder and the other one a shadowbox, and a decorative bag using an embossing folder! The cost is $15 and all you need to bring are your scissors and favorite adhesives. The schedule is as follows:

Thursday, December 2nd   12:00
Thursday, December 2nd     5:00
Sunday, December 5th      2:00

One of the cards you'll make is a shadow box card using the Peaceful Cabin Bundle.


The next card is a Christmas gift card or money holder.


Now let's take a look at the bag that you'll emboss with the Parisian Flourish Embossing Folder. I added some VersaMark to the embossing folder before embossing the bag, then heat embossed it with gold embossing powder.


If you live close to Tallahassee, and you would like to attend this class, please contact me.


Subscribe to My Blog and Newsletter
* indicates required

Sunday, November 21, 2021

Merriest Frames for Christmas Countdown Blog Hop


Hi, Crafty People!
Today I'm hopping along with a talented group of demonstrators from around the world. We are sharing some of the ways we are counting down to Christmas. I'm making Christmas cards, but the one I'm sharing today is a gift card holder. Some of my family members prefer money or gift cards for Christmas, and this serves that purpose.
The highlight of this card is the Merriest Frames Hybrid Dies and Embossing Folder. Hybrid means you can cut and emboss at the same time. I actually choose to cut first, then emboss, as I get a better embossed designed that way. Let me show you how I achieved this look.

First, I cut the Evening Evergreen Shimmery Vellum with the Merriest Frames die, then I embossed it with the hybrid embossing folder.

Next, I cut it in half.
I then overlapped the two pieces to form the piece below.
I stamped my sentiment on Very Vanilla in Cherry Cobbler, and cut with a Rectangle Stitched die. This piece fits perfectly over the center of the modified Merriest Frames piece.

The card base is Crumb Cake 11" x 5 1/2" scored at 4 1/8" and 8 3/8". I cut the top flap with the scalloped-edged Basic Borders die.

The poinsettia is from the Merriest Moments stamp set, and the greeting is from the Evergreen Elegance stamp set. 

The below view shows the top edge of the flap, and also where I glued in a strip to hold the gift card.
The designer series paper you see here is from the Sweet Stockings pack. I sponged over each piece with Soft Suede to give it more of a distressed look. The original paper is Cherry Cobbler and white.

If you would like a complete tutorial, click on the box below.
Please take a minute to hop along to the other demonstrators' websites and check out their awesome projects.


Subscribe to My Blog and Newsletter
* indicates required
Product List