Saturday, August 16, 2025

In-Person Classes Begin Next Thursday-Several Awesome Cards to Make!


Hello and welcome to my blog. My next In-Person classes are coming up beginning Thursday, August 21st.  You will make 2 All Occasions cards and 1 Christmas Card. It's never too early to start on those Christmas cards! Class cost is $25 or free with a $35 order. This includes written instructions and envelopes. The schedule is as follows:

Thursday, August 21st at 12:30
Thursday, August 21st at 5:00
Sunday, August 24th at 1:30
Monday, August 25th at 12:00 Full Class

This is one of the cards you will make. It features 2 exciting products - the awesome Sunflower Embossing Folder and the Coneflower Celebration Bundle.


This next card features the Charming Day Bundle. Coloring on vellum is a fun technique!


And the Christmas card! The Peaceful Greenery Embossing Folder is the highlight of this card.


Let me know as soon as possible which day and time you would like to attend. Hope to hear from you!

Click here to see my current class schedule.

 Thank you for visiting my blog.


Subscribe to My Blog and Newsletter
* indicates required

Thursday, August 14, 2025

Sunflower Embossing Folder for a Stunning Card


Hello and welcome to my blog! Today I want to share a card made with the awesome Sunflower Embossing Folder. This folder brings embossing to new heights!

At the end of this post is a link for you to download a free tutorial with all the instructions and measurements and, also, a video showing the construction of this card. Links to all the supplies I used are also at the bottom. First, let's look at some pictures showing the steps involved in making this card.

Here is the front of the card.  Isn't it stunning!

Sunflower-Embossing-Folder-Stampin-Up

I started with a 3 7/8" x 5 1/8" piece of Crushed Curry cardstock that was embossed with the Sunflower Embossing Folder.

Sunflower-Embossing-Folder-Stampin-Up

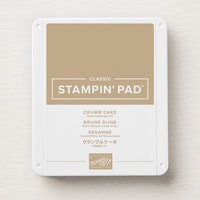
On the DEBOSSED side, I colored the center with Crumb Cake for the whole center and Pecan Pie for the very center, using a dauber. Dark Granny Apple Green Blend was used to color the leaves. Light Darling Duckling and Light Timid Tiger Blends were used to color 2 of the larger sunflowers. Blend the Timid Tiger into the Darling Duckling with the Darling Duckling Blend.

Sunflower-Embossing-Folder-Stampin-Up

Now the exciting part! Drag an Early Espresso ink pad across the whole Crushed Curry piece and watch the flowers and leaves pop!

Sunflower-Embossing-Folder-Stampin-Up

The above piece I lightly applied pressure to the ink pad while dragging it across. The below piece I applied a lot of pressure and got a much darker look.

Sunflower-Embossing-Folder-Stampin-Up

The sentiment was stamped in Early Espresso on Pumpkin Pie and cut with a die from Textured Notes Dies.

Sunflower-Embossing-Folder-Stampin-Up

A strip of Crushed Curry was cut with a die from the Fancy Borders Dies and adhered to the left side. A piece of Crushed Curry ribbon was adhered on top of this piece.

Sunflower-Embossing-Folder-Stampin-Up

The inside Pumpkin Pie piece was cut with a die from Textured Notes and stamped in Early Espresso. The sentiment is from the Layered Thoughts stamp set.

Sunflower-Embossing-Folder-Stampin-Up

One last look at the front.

Sunflower-Embossing-Folder-Stampin-Up

I hope you will give this stunning card a try. To download your free tutorial, just click on the box below.
 
Click on the picture below to visit my YouTube Channel to watch the construction of this card from start to finish. Please subscribe to my channel while you're there. 


Links to all the supplies I used are listed below.

Click here to see my current class schedule.

 Thank you for visiting my blog.


Subscribe to My Blog and Newsletter
* indicates required
Product List

Wednesday, August 6, 2025

August Every Other Month Crafty Toolbox

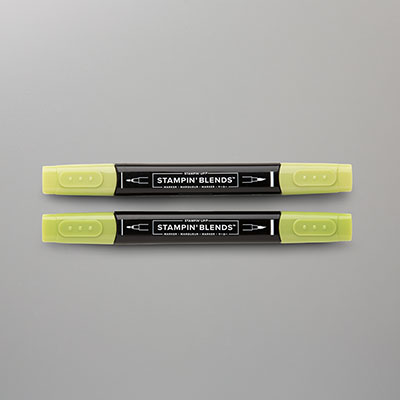
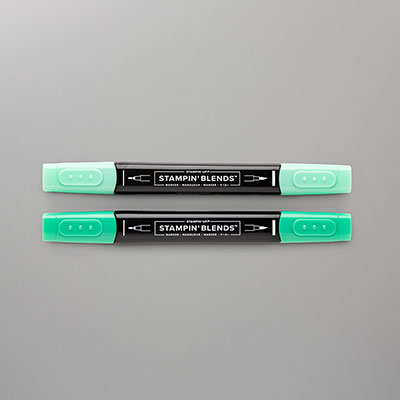
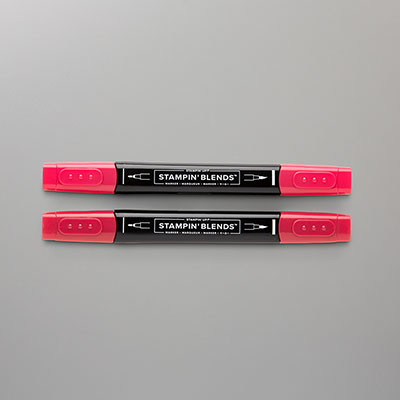
Introducing the August Every-Other-Month (the even number months) Crafty Toolbox. Below are pictures of the items that will be in the August box with the Stampin' Blends Darling Duckling Combo pack. With this month, I will begin including the new In Colors in the toolbox. Let me know if you would like to receive this month's Toolbox by filling out the form at the bottom of this post. (If you received one previously, you will automatically receive one when I receive your payment but let me know if you want to pass this month.) Deadline to sign up is by August 15th. The price of the toolbox is $20 plus $5 for shipping, if I need to mail it to you. There are more than $25 in products included in the toolbox.

Every box starts with a set of Blends. I also offer the option of an ink spot and reinker. You may specify which ink spot and reinker color you would like to receive. Each month also has a sheet of dimensionals and a handmade card!!

Let's look at the contents of this month's toolbox.

Darling Ducklings Combo Blends Pack


6 Card Bases and Matching Envelopes from the Bright & Beautiful Memories & More Pack


1 Package of the Iridescent Adhesive-Backed Discs


One Sheet of Dimensionals


Click on this box to sign up. If you would like more information, keep reading for all the details. Don't miss out on this month's Crafty Toolbox! 
More Details about the Every Other Month Crafty Toolbox

What is a Crafty Toolbox?

It's a collection of Stampin' Up! crafting supplies you'll need to complete your crafting projects! An assortment of current crafting supplies such as embellishments, ribbons, adhesives, spritzers, glue dots, water painter, daubers, Blender Pens, embossing powders, envelopes, etc. will be inside each kit. You  don’t know what you’ll get each month. It will be a happy surprise!

How often will I receive the Toolbox?

Every other month (the even number months) you will receive an assortment of products valued at $20 or more. 

Will there be any recurring products?

Yes, there are. What you WILL receive each month is one Blends Combo Pack (a different color each month) and a sheet of dimensionals (total $10 value). I’ll also send you one handmade card.

There is also another option. You can choose to receive an ink spot with the matching reinker instead of a Blends Combo. Yay, choices!!

How long am I obligated?

There is no obligation, and you can stop your subscription at any time. 

How much does it cost?

This happy little toolbox is only $25, which includes $5 for shipping, so you’re getting $25 in supplies for $20! If you live locally and will pick up your Toolbox, then the cost is $20.

How do I pay?

Payment is by PayPal, check, or cash. If paying by check, your Toolbox will be mailed after your check clears.

What is the deadline to sign up each month?

Orders and payments need to be placed by the 15th of each month. Your Toolbox will be mailed around the 25th.

How do I sign up?

Click on the box below to fill out the form to sign up. You will need to pick the option to subscribe for 6 months or month to month. With either option, you will receive an invoice each month to pay for that month's Toolbox.


Subscribe to My Blog and Newsletter
* indicates required

Elegant Christmas Card made with the Jolly Holly Hybrid 3D Embossing Folder and Season of Elegance Specialty Paper

Jolly-Holly-3D-Embossing-Folder-Christmas-Stampin-Up

Hello and welcome to my blog! It's time to start planning those Christmas cards! Today I want to share an elegant card made with the Jolly Holly Hybrid 3D Embossing Folder and stamp set. This is a fairly easy card to make but gives a WOW effect.

At the end of this post is a link for you to download a free tutorial with all the instructions and measurements and, also, a video showing the construction of this card. Links to all the supplies I used are also at the bottom.

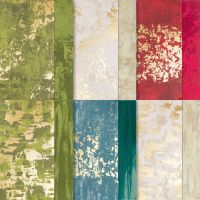
Here is the front of the card. The Jolly Holly Hybrid 3D Embossing Folder has a coordinating die inside that cuts the holly leaves so they can be popped up. The Season of Elegance Specialty Paper is a beautiful choice for this embossing folder. 

Jolly-Holly-3D-Embossing-Folder-Christmas-Stampin-Up

The Jolly Holly sentiment was heat embossed in gold and adhered between the cut-out holly leaves. Red foil circles were punched and adhered to the holly centers.

Jolly-Holly-3D-Embossing-Folder-Christmas-Stampin-Up

The inside Very Vanilla piece was cut with the largest Textured Notes die. The stamps are from the Jolly Holly stamp set and stamped with Shaded Spruce and Real Red ink.

Jolly-Holly-3D-Embossing-Folder-Christmas-Stampin-Up

Another look at the front.

Jolly-Holly-3D-Embossing-Folder-Christmas-Stampin-Up
I hope you will give this card a try. To download your free tutorial, just click on the box below.


Click on the picture below to visit my YouTube Channel to watch the construction of this card from start to finish. Please subscribe to my channel while you're there. 


Links to all the supplies I used are listed below.

Click here to see my current class schedule.

 Thank you for visiting my blog.


Subscribe to My Blog and Newsletter
* indicates required
Product List