Hello and welcome to my blog! Today I'm hopping with a great group of demonstrators from around the world. It's our Crafty Collaboration Share it Sunday blog hop. I'm sharing a framed piece of artwork I made with our Wreath of Blooms kit.
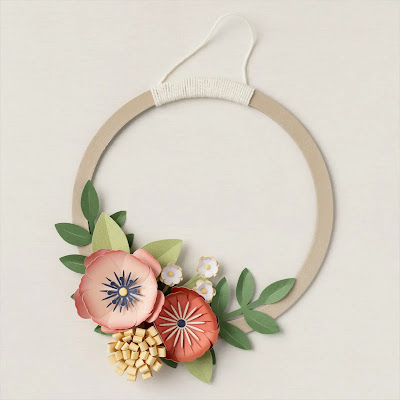
You aren't going to believe how easy this was to make! I put the basic kit together in about 30 minutes. The kit comes with all these flowers, except the daisy, and most of the leaves. The picture below shows the actual kit and how it would look it you made it right out of the box. Below, I have listed links to all the supplies I used to make mine.
Obviously, I decided to alter this kit and turn it into a framed work of art! The first thing I changed was the So Saffron flower in the lower left part of the wreath. I really didn't like this flower and it also didn't fit in the frame. It was too tall. Instead, I punched 3 daisies with the small daisy punch out of So Saffron cardstock, adhered them together and added a black center to match the other 2 flowers.
I discovered Garden Green and Pear Pizzazz card stock matched the leaves in the kit, so I cut some extra greenery with the Forever Flourish dies. So Saffron cardstock was also used to cut a greenery stem to balance off the So Saffron flowers already in the kit.
The butterfly was cut with a die from Brilliant Wings out of a Cajun Craze design from the He's the Man Designer Series Paper. Plain Cajun Craze cardstock would also work. This background paper is from the Regency Park 6" x 6" Designer Series Paper pack. I had to mount this piece on a 8" x 8" piece of Petal Pink cardstock because my frame is 8" x 8", and the designer series paper wasn't large enough by itself.
Before I decided to frame the flowers, I tried a couple of different ideas. Below is the chipboard wreath wrapped all the way around in burlap ribbon.
As you can see, this kit is very versatile. If you live in my area (Tallahassee, Florida), I'm offering this class next week at my in-person classes. Here's the link with all the information.
Please take a minute to check out the other demonstrators blogs and the awesome projects they have made. Thanks so much for stopping by.
Subscribe to My Blog and Newsletter

.JPG)

.JPG)

.JPG)
.JPG)
.JPG)
.JPG)
.JPG)
.JPG)


I love how you have used the wreath kit, such a pretty piece of home decor x
ReplyDeleteThanks so much!
DeleteBeautiful project!
ReplyDeleteThanks so much!
DeleteOH WOW! That is GORGEOUS!
ReplyDeleteThanks so much!
DeleteWow! This is gorgeous. What a beautiful way to use that kit. Thanks for the inspiration!
ReplyDeleteThanks so much!
DeleteFantastic alternative to the kit. Lovely project
ReplyDeleteThanks so much!
DeleteLove it in a frame!
ReplyDeleteThanks so much!
DeleteRobbie - Wow - I love what you did with this kit. The wreath wasn't my favorite - but I love the framed picture! Great job!
ReplyDeleteThanks so much!
DeleteAbsolutely love how you used the kit to go “outside the box”; I can honestly say that I love your use of the kit better than the idea SU came up with! I would be proud to display something so beautiful in my home or to present it as a gift to someone special to me!
ReplyDeleteThank you!
DeleteGreat ways to show off this kit! I really like the framed one!
ReplyDeleteThank you!
DeleteLove how you made the kit into a gorgeous framed piece of art - I'm going to try that too for my new craft area when we move :-)
ReplyDeleteThank you! I think you’ll love it.
DeleteLove the idea making into framed art. Looks like you didn’t use the glass from frame. Am I correct? Thanks loads for the inspiration!!
ReplyDeleteYes, I did keep the glass in the shadow box frame. You have a good eye. I did take the glass out to take the pictures because the glass was causing a reflection and glare. I put it back in afterwards. Thank you!
DeleteOh Wow! I just love this idea! Now I need to buy the wreath kit. Thanks so much for sharing!
ReplyDelete