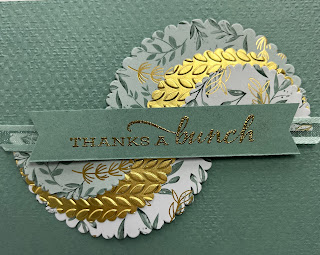

Monday, January 24, 2022

Split Circle Technique for Kylie's International Highlights Winners Hop


Hello and welcome to Kylie Bertucci's International Winners Blog Hop! Today I'm joining Kylie Bertucci and a group of very talented demonstrators for a blog hop around the world. I'm so excited to be participating in the Top Ten International Highlights Winners Blog Hop! I earned this honor with my card, Soft Pastels Sunset and Boat card. Thank you so much for voting for me.
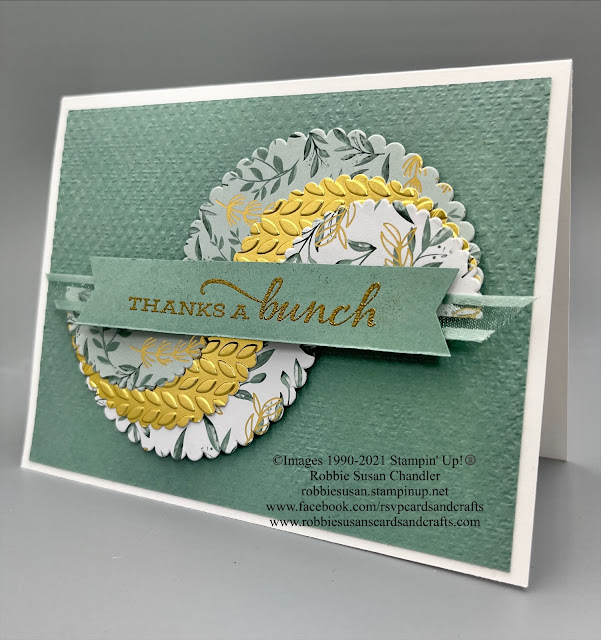
The technique I'm sharing with you today is called the split circle technique. Basically, you cut 3 different size circles, then cut them in half. The 3 different sizes are then arranged on top of each other, but I'll cover this step by step. The hardest part is deciding which designer series paper you want to use.

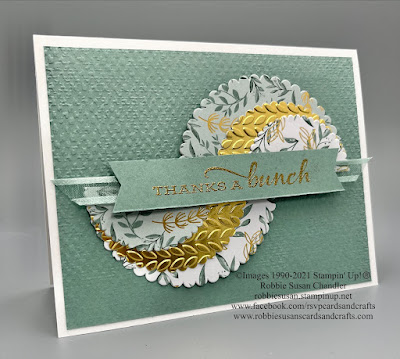
I started with an 11" x 4 1/4" card base of Thick Basic White. The next layer is a 4" x 5 1/4" piece of Soft Succulent. I embossed the Soft Succulent piece with the Tasteful Textile Embossing Folder.

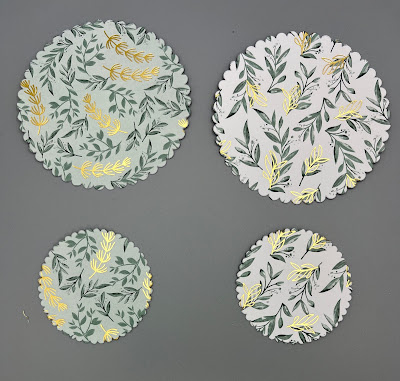
I decided to use the Ever Eden Designer Series Paper and gold foil, but you could use your favorite paper. The Layering Circle dies were used and I fancied it up a bit and use the scalloped-edged one.  

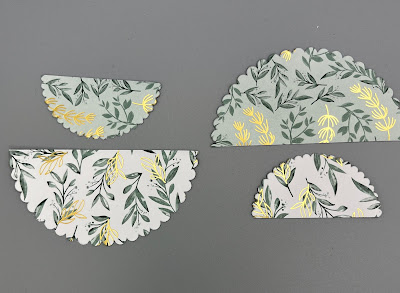
The larger circles were cut with the largest die and the smaller circle with the 4th from the smallest. You will need to cut 2 of each. This is actually going to be enough circles for 2 cards.

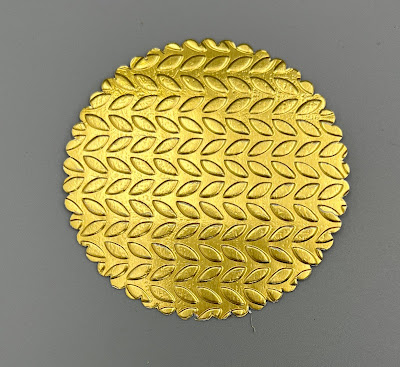
The gold foil, which is the middle design, was cut with the 3rd from largest die. I embossed this piece with the Meadow Moments die. If you were to make 2 cards, you would need to cut 2 of the gold foil pieces.

Next, you cut all the circles in half, as pictured below.

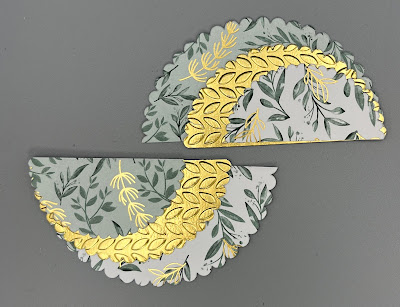
The designer series paper is arranged in opposite order and the gold is added in the middle.
This next step is SUPER important! Line all the circles up even on one side or the other, making sure you line both halves up the same direction.  I chose to line mine up with the bottom corners even on the right side. When you do this, your pattern will flow from top to bottom as shown below.
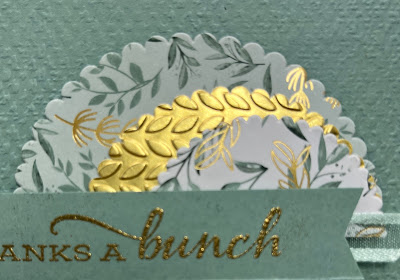
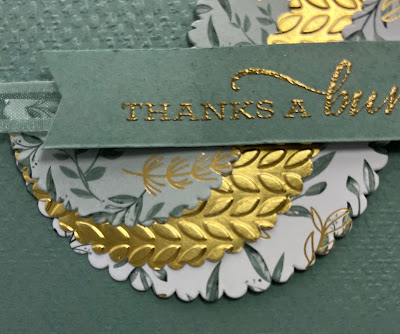


I added a strip of Open Weave Ribbon in Soft Succulent under the sentiment.


Below are 3 other card ideas with this technique.


Wouldn't you just love to receive or send this thank you card? If you would like to duplicate this card, the supplies I used are listed below with links to my store.

Please take a minute to check out the projects from the other Top 10 Winners!


January and February are Sale-A-Bration months!! What does that mean, you ask? Well, I'm glad you asked, because it means that for every $50 increments in your order, you can receive free Sale-A-Bration items, like the designer series paper I used today. There are special products available when your order is $100!

Wait, there's more! If you would like to join my team or become a discount shopper, Stampin' Up! has added an extra incentive. Along with receiving $125 for $99 (no shipping fee, just tax added), you also will receive 2 extra stamp sets of your choice from any current stamp sets. Wow!! So, click here to join my team!


Subscribe to My Blog and Newsletter
* indicates required
Product List

Bouquet of Love for the Crafty Collaborations Valentine's Day Cards Blog Hop


Hello and today we've got a talented group of global demonstrators participating in a Valentine's Day blog hop.  

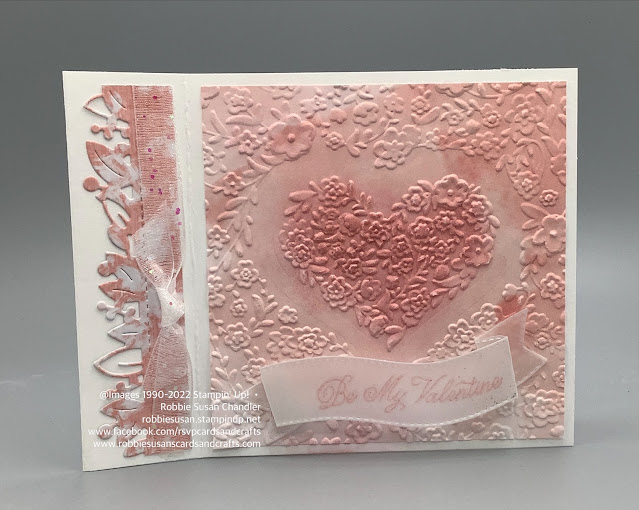
I'm sharing a card made with the wonderful 3D embossing folder, Bouquet of Love. A complete tutorial with instructions and measurements is available for you to download below the pictures.

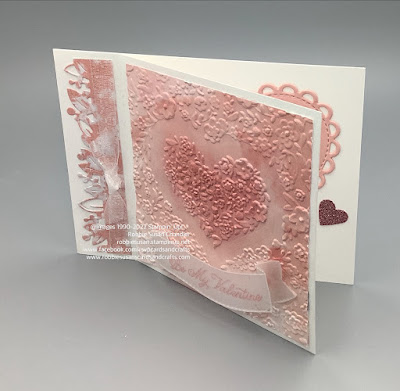
This card is a book-bind fold card and the card base is Thick Basic White. If you're not using the Thick Basic White for your card base when you need a white base, I would advise you to. It really gives your card a more professional look.

This picture shows the book-bind fold.

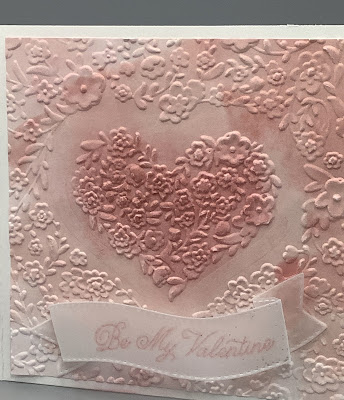
The designer series paper used on the front large section (4" x 4") is from the Sweet Talk paper pack. It was embossed with the Bouquet of Love 3D Embossing Folder. The center heart had Blushing Bride ink blended on over it to make it stand out. The sentiment was stamped on vellum in VersaMark and then Blushing Bride. I heat embossed it with clear embossing powder to seal it on the vellum. The stamp and die are from the Always in my Heart stamp set and Floral Hearts dies.

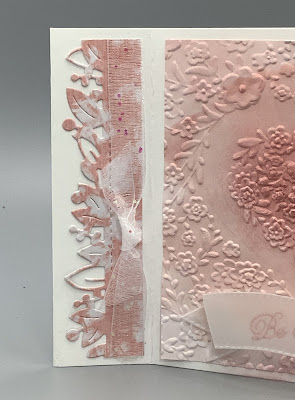
The side designer series paper (1" x 4") is from the Symbols of Fortune paper pack and is cut with a die from Eden's Dies.

Complete the inside with your own personal style. I chose this heart die and stamp set that are retired, because they are one of my favorites.

If you would like to make this card, the products used are listed below with links to my store.

Please hop on along to the other talented demonstrators and check out their awesome projects.


January and February are Sale-A-Bration months!! What does that mean, you ask? Well, I'm glad you asked, because it means that for every $50 increments in your order, you can receive free Sale-A-Bration items. There are special products available when your order is $100!

Wait, there's more! If you would like to join my team or become a discount shopper, Stampin' Up! has added an extra incentive. Along with receiving $125 for $99 (no shipping fee, just tax added), you also will receive 2 extra stamp sets of your choice from any current stamp sets. Wow!! So, click here to join my team!


Subscribe to My Blog and Newsletter
* indicates required
Product List

Saturday, January 22, 2022

Valentine's Card for Stamping with Friends Blog Hop


Hello and welcome to the Stamping with Friends Blog Hop. This is a group of Stampin' Up! demonstrators who share our love of card making with you through blog hops. Our theme for this blog hop is Valentine's Day Cards.

The card I'm sharing with you today is one my customers will be making this coming up week at my in-person classes. This is a link below all the pictures of a free download with all the measurements and instructions.

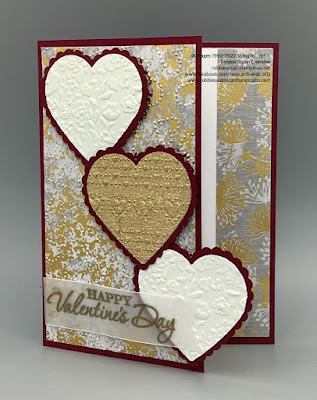
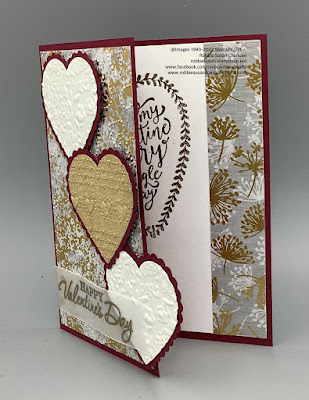
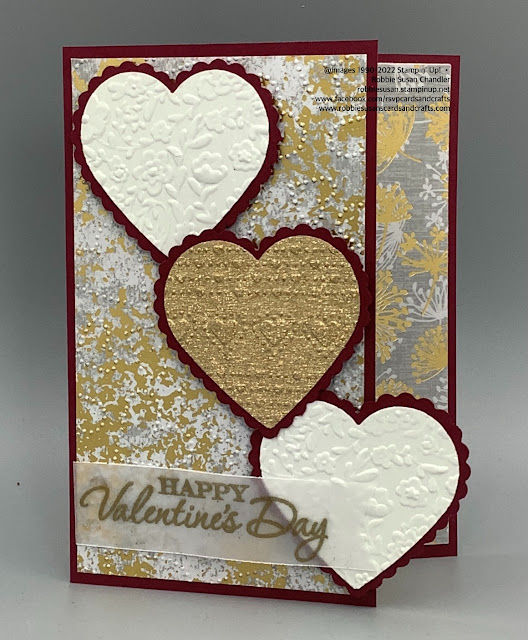
I started with a 5 1/2" x 8 1/2" Merry Merlot card base folded in half with 1" cut off the right front side. The designer series paper I used on this card is from the Symbols of Fortune pack.

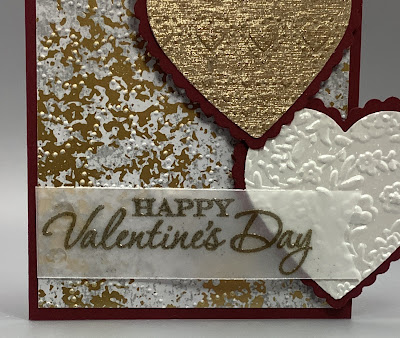
The picture below shows this detail better.

The designer series paper was embossed with one of the embossing folders from the Dotty Hearts set.

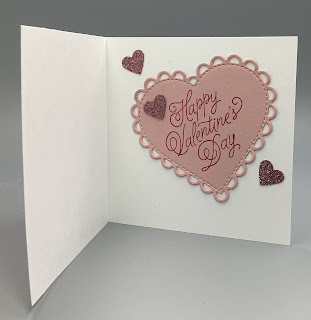
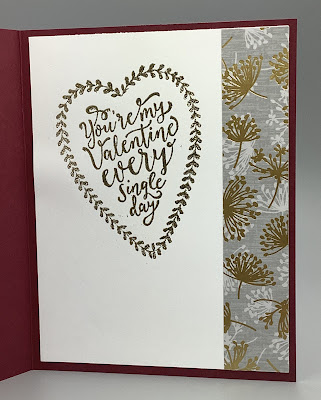
I adhered a Basic White 4" x 5 1/4" piece to the inside then adhered a 1" x 5 1/4" piece of designer series paper to the right side of it. My sentiment is from a retired set, Sure Do Love You, but you could use any Valentine's Day saying you have.


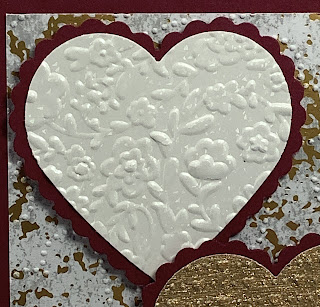
The hearts were punched with the Heart Punch pack. I used Merry Merlot for the base and this heart was punched from our new Mother of Pearl Specialty Paper. I embossed it with the Bouquet of Love Embossing Folder.

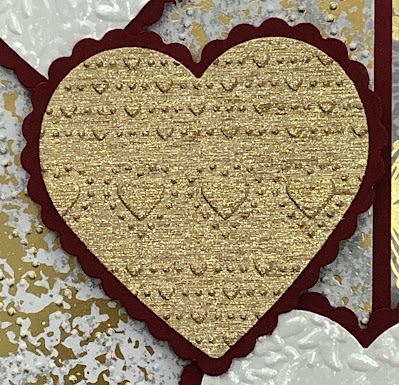
The other heart was punched from Gold Metallic Specialty paper. I love this paper! In the pack are 4 sheets of this brushed gold and 4 sheets of a gorgeous rose gold paper. I embossed it with the other embossing folder from the Dotty Hearts set.

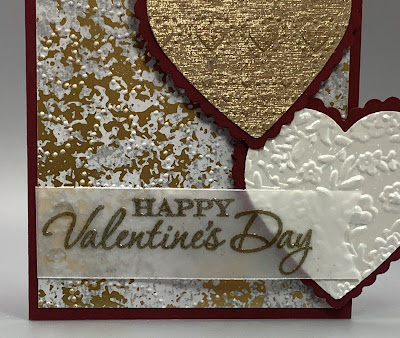
I stamped my sentiment on vellum with VersaMark and heated embossed it with gold embossing powder. This is another retired stamp from the Heart to Heart set, but any sentiment will work.


I hope you are inspired by my card and will give it a try. To continue along the hop, click on the image below to see the great project our next demonstrator has made to awe you. I know you will love it.


January and February are Sale-A-Bration months!! What does that mean, you ask? Well, I'm glad you asked, because it means that for every $50 increments in your order, you can receive free Sale-A-Bration items. There are special products available when your order is $100!

Wait, there's more! If you would like to join my team or become a discount shopper, Stampin' Up! has added an extra incentive. Along with receiving $125 for $99 (no shipping fee, just tax added), you also will receive 2 extra stamp sets of your choice from any current stamp sets. Wow!! So, click here to join my team!


Subscribe to My Blog and Newsletter
* indicates required
Product List